
Traditional airbrushing is a much-loved but hard to execute art form. Unlike the
digital world, mistakes are almost impossible to correct and very costly.
The First use of the airbrush was in the 1890s, achieved by blowing air through a tube. It would often take days and even weeks to complete one traditional piece, which is still the case to this day.
The artist would use the airbrush itself,compressors, paint and other tools, usually
starting with a line drawing. Using masking material, they would airbrush section after section. Plastic transparent self-adhesive lm was placed on top of a line drawing to mask areas, followed by precise cutting of an area to airbrush through.
Photoshop’s own airbrush works with a selection of brushes and Brush palette controls. The digital process is considerably simpler and mess-free. Precise cutting and masking can be achieved with great ease, and mistakes corrected as many times as necessary. The e ect is soft with plenty of shading and multi-tones.
START YOUR ENGINES, PLEASE
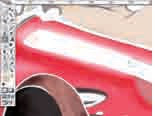
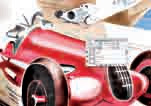
 Set some guidelines Open the ‘line drawing.jpg’ le from this issue’s disc. You’ll see a very rough outline of the image. Create a new layer for the painting. Now go to www.allposters.com/-st/George- Ham-Posters_c35486_.htm and take a grab of the poster this image is based on. Open in Photoshop and use as a reference.
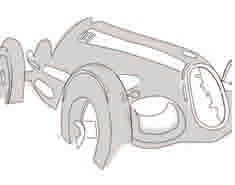
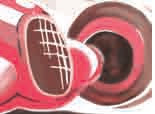
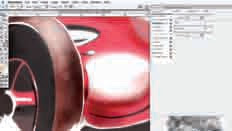
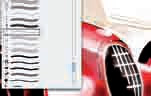
The first paint Click on the Brush tool and load the Wet Media Brushes. Select Watercolor Fat Tip. Set the mode to Normal and the opacity to 10%. Create a new layer called ‘Paint’ and pick a black colour. Click the Airbrush icon in the top Options bar. Cover the car with the soft black brush as shown (left).
Build it up The airbrush e ffect is created by gradually applying more and more colour. Stay with the soft Watercolor Fat Tip brush at a low 10% Opacity and go to the Options bar. Change the brush blending mode to Multiply.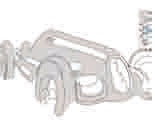
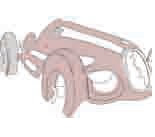
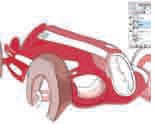
Tinting Load your brush with red for the car and apply a tint at 10% Opacity. Now increase the opacity to 20-25% and apply an additional layer over the previous one. You will see the colour build up and intensify with each stroke and colour layer you apply. Try to cover an area in one long stroke without lifting the brush.
 Other colours Vary the brush opacity as you progress. Observe the original artwork and start concentrating on areas that are denser in colour than others. Switch to other colours in the car such as browns and blacks and apply in the same careful way as the red.
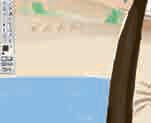
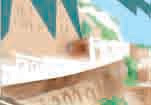
 More fl at colour The car’s pretty much sorted in terms of the first base coat, so we’ll return to it later. Now turn your attention to the background area. Using the original line drawing for guidance, apply tints of low opacity exactly the same as before(Fat Watercolor brush with the Airbrush option clicked). Use the Normal blending mode.

Review your progress Observe the work so far and look out for any sharp edges. Use a small Watercolor Fat Tip brush to smooth out any sharp lines. Sample the colour of the area you wish to smooth out, set an opacity level of 20-30 and apply strokes over the sharp lines.
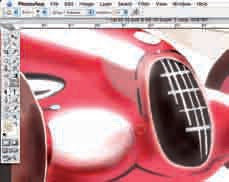
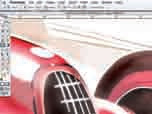
Going for depth Now that most detail is in place, you can concentrate on speci c areas. Use the Watercolor Heavy Pigments brush to add depth to di erent parts of the image. For example, apply repeated strokes to add darker shades of brown to the car wheels and area around the white grid in front of the car.
Another review Continue to apply
darker paint to areas on the image. These are still very loose, because we will add the detail soon. You can also change things at this stage – we used a di erent colour blue for the sky and sea. Just remember to use low opacity and apply lots of coats.
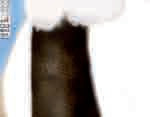
Fill up the trunk Load the Natural Brushes set and pick Stipple 54. Increase its size to 120px. Create a new layer, choose a dark brown and paint in the tree trunk. Pick a darker brown and apply along the outside edge, then select a light brown and paint down the middle.
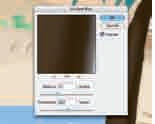
Blurred vision Still on the Trunk layer, go to Filter>Blur>Surface Blur and apply the settings as above. If you haven’t got Surface Blur, Gaussian will do the trick. The aim is to merge the di erent browns applied in the previous step.
Flatten the image Now the basic colours are applied, atten the image. Pick the Eraser tool, load the Basic Brush set and choose a soft mechanical brush. Change its opacity to 70% and start applying to the edges of your existing highlighted areas. The aim is to soften the edges.
Burn rubber Pick the Burn tool. Keep the soft brush and set Range to Midtones. The Exposure setting a ects how dark you want the brush, which needs to be adjusted as and when you need. We started with it set at 19% to start adding shadows around the bumper. Once you’ve got the hang of it, add shadows of various levels to the rest of the car.

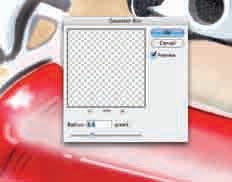
Spray brush So far we’ve kept a smooth look to the image, but most airbrushed paintings have distinctive spray effects. The easiest way to achieve this is by creating a special spray brush, using Photoshop’s Spatter brush as a starting point. See the box over the page for how to create one.
PIMP YOUR RIDE
Although there is a lot of fiddling in this tutorial, there are only three main tools, with two options of fi nish. These tools are the Eraser, the Dodge tool and the Burn tool. Here’s a look at how we build up the airbrush effect.
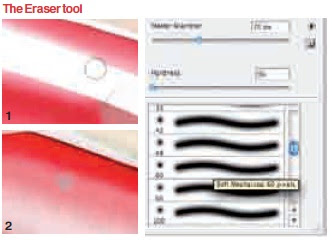
The Eraser is used to soften the harsh lines between colour and highlight areas (white). When used with a soft mechanical brush (1), it gives a smooth transition
between the two, almost giving a hazy effect. When used with the spray brush we created, though (2), it gives more of a speckled look, allowing both the colour and highlight to show through.
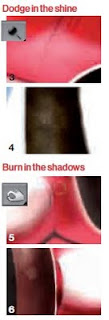
The Dodge tool is similar in effect to the Eraser tool, but is used in midtone areas.
The tool lightens a colour rather than erases it – so reds turn pink. When used with a soft brush it makes a smooth transition (3), but when the spray brush is used it gives the impression of a speckly layer of paint (4). The Burn tool does the opposite! This tool darkens colours, and is controlled by the Exposure setting. The higher you set this, the blacker the effect. By adjusting the exposure you can build up realistic areas of shadow. Again, the soft brush gives a smooth effect (5), while the spray brush we created is more spread out (6).
BURN BABY BURN
Burn with spray Choose the Burn tool and then load your newly created brush. With a low Exposure number (we used 23), start brushing over various areas. Concentrate on the tyres and the bits that you have already burnt. We also did a few strokes over the other shadow areas of the car.
Powder spray Select the Eraser and load your spray brush once more. Set the brush to 54 pixels and change the opacity to 70%. Lightly paint over the highlight areas you softened in step 12. The Eraser will allow some of the red to show through, giving the impression of spray.
Burning background Select the Burn tool and load the spray brush once more. With Range set to Midtones and Exposure set to 19%, start applying darker sprayed areas to the background. It’s up to you where you do this – refer to our nal image and you can see we applied it to the side of the buildings, the sea, the sky and the ramparts.
THERE’S NO SMOKE WITHOUT FIRE
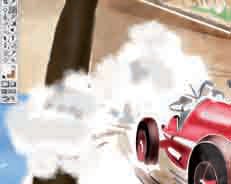
Smokey and the Bandit l Create a new layer, select the Brush tool and choose your spray brush once more. Set the foreground colour to white. Move your cursor in loose circular motions to create a cloudy effect. Choose a light grey and dab a few patches here and there. Pick a darker grey and do a couple of dabs.
Smokey and the Bandit II Duplicate your Smoke layer, go to Filter>Blur>Surface Blur (or Guassian Blur) and change Radius to 47 pixels and Threshold to 159. Click OK. We’ve done this in order to soften and merge the greys and whites and create a more smoky effect.
Middle of the road Select the Dodge tool and load your spray brush. Set Range to Midtones and Exposure to 100%. Paint over a few of the midtone colours – for example, the middle of the palm tree trunk and the small palm trees. The aim is to get more speckles and introduce some depth.
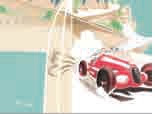
Gloss finnish Make a new layer and choose a bright red for your foreground colour. Select the Brush tool and then load a soft mechanical brush. In a sweeping motion, gently brush across the middle of the bonnet, the right bumper and anywhere else you want a bit more of a sheen. Change this layer to Overlay and drop the opacity to 64%.
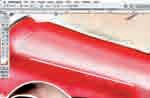
Firm but fair Although we’ve been saying that you have to keep edges soft, a few harsher highlight lines will make things shine. Create a new layer, pick the Brush tool and select a small hard mechanical brush at 6px. Set white as your foreground colour and click under the top car highlight. Hold down Shift, move your cursor to the end of the highlight and click again for a straight line.
Extra sheen Still on the same layer, continue to add white highlights where you want more sparkle on the car. Go to Filter>Blur>Gaussian Blur and change Radius to 6.6. Click OK.
Pure bling Create a new layer and load the Assorted Brushes set. Pick the Crosshatch 4 and make sure your foreground colour is still white. Position the brush at the front end of the bonnet and click four or ve times on the same spot. This adds a glint e ect. Adjust the size of the brush and repeat on the grill and any other areas you like. Open up Gaussian Blur and set Radius to 1.2. You’re Finnished!
digital world, mistakes are almost impossible to correct and very costly.
The First use of the airbrush was in the 1890s, achieved by blowing air through a tube. It would often take days and even weeks to complete one traditional piece, which is still the case to this day.
The artist would use the airbrush itself,compressors, paint and other tools, usually
starting with a line drawing. Using masking material, they would airbrush section after section. Plastic transparent self-adhesive lm was placed on top of a line drawing to mask areas, followed by precise cutting of an area to airbrush through.
Photoshop’s own airbrush works with a selection of brushes and Brush palette controls. The digital process is considerably simpler and mess-free. Precise cutting and masking can be achieved with great ease, and mistakes corrected as many times as necessary. The e ect is soft with plenty of shading and multi-tones.
START YOUR ENGINES, PLEASE
 Set some guidelines Open the ‘line drawing.jpg’ le from this issue’s disc. You’ll see a very rough outline of the image. Create a new layer for the painting. Now go to www.allposters.com/-st/George- Ham-Posters_c35486_.htm and take a grab of the poster this image is based on. Open in Photoshop and use as a reference.
The first paint Click on the Brush tool and load the Wet Media Brushes. Select Watercolor Fat Tip. Set the mode to Normal and the opacity to 10%. Create a new layer called ‘Paint’ and pick a black colour. Click the Airbrush icon in the top Options bar. Cover the car with the soft black brush as shown (left).
Build it up The airbrush e ffect is created by gradually applying more and more colour. Stay with the soft Watercolor Fat Tip brush at a low 10% Opacity and go to the Options bar. Change the brush blending mode to Multiply.


Tinting Load your brush with red for the car and apply a tint at 10% Opacity. Now increase the opacity to 20-25% and apply an additional layer over the previous one. You will see the colour build up and intensify with each stroke and colour layer you apply. Try to cover an area in one long stroke without lifting the brush.
 Other colours Vary the brush opacity as you progress. Observe the original artwork and start concentrating on areas that are denser in colour than others. Switch to other colours in the car such as browns and blacks and apply in the same careful way as the red.
 More fl at colour The car’s pretty much sorted in terms of the first base coat, so we’ll return to it later. Now turn your attention to the background area. Using the original line drawing for guidance, apply tints of low opacity exactly the same as before(Fat Watercolor brush with the Airbrush option clicked). Use the Normal blending mode.
Review your progress Observe the work so far and look out for any sharp edges. Use a small Watercolor Fat Tip brush to smooth out any sharp lines. Sample the colour of the area you wish to smooth out, set an opacity level of 20-30 and apply strokes over the sharp lines.

Going for depth Now that most detail is in place, you can concentrate on speci c areas. Use the Watercolor Heavy Pigments brush to add depth to di erent parts of the image. For example, apply repeated strokes to add darker shades of brown to the car wheels and area around the white grid in front of the car.

Another review Continue to apply
darker paint to areas on the image. These are still very loose, because we will add the detail soon. You can also change things at this stage – we used a di erent colour blue for the sky and sea. Just remember to use low opacity and apply lots of coats.

Fill up the trunk Load the Natural Brushes set and pick Stipple 54. Increase its size to 120px. Create a new layer, choose a dark brown and paint in the tree trunk. Pick a darker brown and apply along the outside edge, then select a light brown and paint down the middle.

Blurred vision Still on the Trunk layer, go to Filter>Blur>Surface Blur and apply the settings as above. If you haven’t got Surface Blur, Gaussian will do the trick. The aim is to merge the di erent browns applied in the previous step.

Flatten the image Now the basic colours are applied, atten the image. Pick the Eraser tool, load the Basic Brush set and choose a soft mechanical brush. Change its opacity to 70% and start applying to the edges of your existing highlighted areas. The aim is to soften the edges.

Burn rubber Pick the Burn tool. Keep the soft brush and set Range to Midtones. The Exposure setting a ects how dark you want the brush, which needs to be adjusted as and when you need. We started with it set at 19% to start adding shadows around the bumper. Once you’ve got the hang of it, add shadows of various levels to the rest of the car.

Spray brush So far we’ve kept a smooth look to the image, but most airbrushed paintings have distinctive spray effects. The easiest way to achieve this is by creating a special spray brush, using Photoshop’s Spatter brush as a starting point. See the box over the page for how to create one.
PIMP YOUR RIDE
Although there is a lot of fiddling in this tutorial, there are only three main tools, with two options of fi nish. These tools are the Eraser, the Dodge tool and the Burn tool. Here’s a look at how we build up the airbrush effect.

The Eraser is used to soften the harsh lines between colour and highlight areas (white). When used with a soft mechanical brush (1), it gives a smooth transition
between the two, almost giving a hazy effect. When used with the spray brush we created, though (2), it gives more of a speckled look, allowing both the colour and highlight to show through.

The Dodge tool is similar in effect to the Eraser tool, but is used in midtone areas.
The tool lightens a colour rather than erases it – so reds turn pink. When used with a soft brush it makes a smooth transition (3), but when the spray brush is used it gives the impression of a speckly layer of paint (4). The Burn tool does the opposite! This tool darkens colours, and is controlled by the Exposure setting. The higher you set this, the blacker the effect. By adjusting the exposure you can build up realistic areas of shadow. Again, the soft brush gives a smooth effect (5), while the spray brush we created is more spread out (6).
BURN BABY BURN

Burn with spray Choose the Burn tool and then load your newly created brush. With a low Exposure number (we used 23), start brushing over various areas. Concentrate on the tyres and the bits that you have already burnt. We also did a few strokes over the other shadow areas of the car.

Powder spray Select the Eraser and load your spray brush once more. Set the brush to 54 pixels and change the opacity to 70%. Lightly paint over the highlight areas you softened in step 12. The Eraser will allow some of the red to show through, giving the impression of spray.

Burning background Select the Burn tool and load the spray brush once more. With Range set to Midtones and Exposure set to 19%, start applying darker sprayed areas to the background. It’s up to you where you do this – refer to our nal image and you can see we applied it to the side of the buildings, the sea, the sky and the ramparts.
THERE’S NO SMOKE WITHOUT FIRE

Smokey and the Bandit l Create a new layer, select the Brush tool and choose your spray brush once more. Set the foreground colour to white. Move your cursor in loose circular motions to create a cloudy effect. Choose a light grey and dab a few patches here and there. Pick a darker grey and do a couple of dabs.

Smokey and the Bandit II Duplicate your Smoke layer, go to Filter>Blur>Surface Blur (or Guassian Blur) and change Radius to 47 pixels and Threshold to 159. Click OK. We’ve done this in order to soften and merge the greys and whites and create a more smoky effect.

Middle of the road Select the Dodge tool and load your spray brush. Set Range to Midtones and Exposure to 100%. Paint over a few of the midtone colours – for example, the middle of the palm tree trunk and the small palm trees. The aim is to get more speckles and introduce some depth.

Gloss finnish Make a new layer and choose a bright red for your foreground colour. Select the Brush tool and then load a soft mechanical brush. In a sweeping motion, gently brush across the middle of the bonnet, the right bumper and anywhere else you want a bit more of a sheen. Change this layer to Overlay and drop the opacity to 64%.

Firm but fair Although we’ve been saying that you have to keep edges soft, a few harsher highlight lines will make things shine. Create a new layer, pick the Brush tool and select a small hard mechanical brush at 6px. Set white as your foreground colour and click under the top car highlight. Hold down Shift, move your cursor to the end of the highlight and click again for a straight line.

Extra sheen Still on the same layer, continue to add white highlights where you want more sparkle on the car. Go to Filter>Blur>Gaussian Blur and change Radius to 6.6. Click OK.

Pure bling Create a new layer and load the Assorted Brushes set. Pick the Crosshatch 4 and make sure your foreground colour is still white. Position the brush at the front end of the bonnet and click four or ve times on the same spot. This adds a glint e ect. Adjust the size of the brush and repeat on the grill and any other areas you like. Open up Gaussian Blur and set Radius to 1.2. You’re Finnished!
+android+porn+app+sex+%5B4%5D.png)


0 komentar:
Posting Komentar